In this part i am going to explain how to create a simple android application. Before start the topic make sure that you have the following tools available in your computer. If not please go to the topic "Prepare PC for android development".
1. jdk 1.7
2. Eclipse IDE.
3. ADT for eclipse.
4. Android SDK.
5. AVD
For creating a new project just open up the eclipse IDE and follow the steps given bellow.
Step 1:
Click File ---> New --> Project
Step 2:
You got a new project window and choose android application project from it and click next.
Step 3:
In the next window you have to fill up three fields, Application name, project name and Package name.
Provide any appropriate name for project and application starting with capital letter. It is also possible to use same name for project and application.
Step 4:
Provide a package name for your project starting with "com." . For making your apps unique it is recommended that you have to use reverse of your domain name as the package name.
Step 5:
You have to choose a minimum required sdk version for your apps. Select the most older version as minimum sdk. This will ensure that your application will run on older platform also.
Step 6:
You have to specify a target SDK version. Select the latest version as target.
Step 7:
Choose the latest version for compile with drop list.
Step 8:
Choose any theme for your application and click next.
Step 9:
Select the crate custom launcher icon and create activity check box in the new window and click next.
 Step 10:
In the next window, you have an option for choosing your own launcher icon for your application. If you want your own icon for your app, then chose it and click next. If you not specify any launcher icon image, your app get a default android app icon. Click next.
Step 11:
In the next window you have to choose create a blank activity and click next.
 Step 12:
In the next window you have to specify the name for your activity and layout and click finish. Here i name it as First and first_layout. Always specify the activity name in capital letters because it representing a java class in our project. The layout name must be specified in small letter.
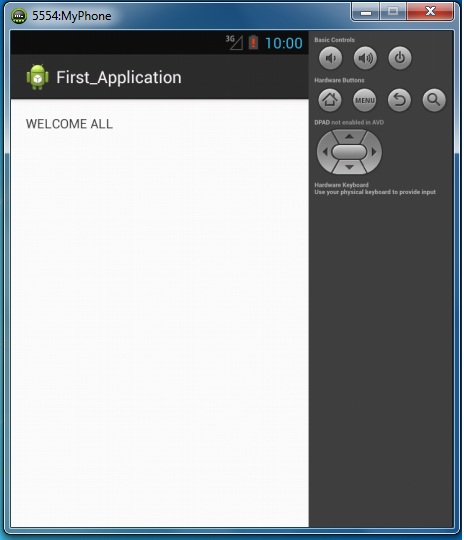
 After doing all the above steps, your project is created in the ide and you can see it in the project explorer window. The project is for displaying a greeting message on the screen. The codes for the project is given bellow. For more information see the video tutorial of this topic.
You can find the First.java file from package present in the src folder and the first_layout.xml find from the layout folder under the resource folder.
first_layout.xml
<RelativeLayout xmlns:android="http://schemas.android.com/apk/res/android"
xmlns:tools="http://schemas.android.com/tools"
android:layout_width="match_parent"
android:layout_height="match_parent"
android:paddingBottom="@dimen/activity_vertical_margin"
android:paddingLeft="@dimen/activity_horizontal_margin"
android:paddingRight="@dimen/activity_horizontal_margin"
android:paddingTop="@dimen/activity_vertical_margin"
tools:context=".First" >
<TextView
android:layout_width="wrap_content"
android:layout_height="wrap_content"
android:text="WELCOME ALL" />
</RelativeLayout>
test
For creating a new project just open up the eclipse IDE and follow the steps given bellow.
Step 1:
Click File ---> New --> Project
Step 2:
You got a new project window and choose android application project from it and click next.
 |
| Click image for full size |
In the next window you have to fill up three fields, Application name, project name and Package name.
Provide any appropriate name for project and application starting with capital letter. It is also possible to use same name for project and application.
Step 4:
Provide a package name for your project starting with "com." . For making your apps unique it is recommended that you have to use reverse of your domain name as the package name.
Step 5:
You have to choose a minimum required sdk version for your apps. Select the most older version as minimum sdk. This will ensure that your application will run on older platform also.
Step 6:
You have to specify a target SDK version. Select the latest version as target.
Step 7:
Choose the latest version for compile with drop list.
Step 8:
Choose any theme for your application and click next.
 |
| Click image to view full size |
Select the crate custom launcher icon and create activity check box in the new window and click next.

In the next window, you have an option for choosing your own launcher icon for your application. If you want your own icon for your app, then chose it and click next. If you not specify any launcher icon image, your app get a default android app icon. Click next.
 |
| Click the image for full size |
In the next window you have to choose create a blank activity and click next.

In the next window you have to specify the name for your activity and layout and click finish. Here i name it as First and first_layout. Always specify the activity name in capital letters because it representing a java class in our project. The layout name must be specified in small letter.

You can find the First.java file from package present in the src folder and the first_layout.xml find from the layout folder under the resource folder.
first_layout.xml
<RelativeLayout xmlns:android="http://schemas.android.com/apk/res/android"
xmlns:tools="http://schemas.android.com/tools"
android:layout_width="match_parent"
android:layout_height="match_parent"
android:paddingBottom="@dimen/activity_vertical_margin"
android:paddingLeft="@dimen/activity_horizontal_margin"
android:paddingRight="@dimen/activity_horizontal_margin"
android:paddingTop="@dimen/activity_vertical_margin"
tools:context=".First" >
<TextView
android:layout_width="wrap_content"
android:layout_height="wrap_content"
android:text="WELCOME ALL" />
</RelativeLayout>
test
First.java

package com.example;

import android.os.Bundle;
import android.app.Activity;
import android.view.Menu;

public class First extends Activity {

    @Override
    protected void onCreate(Bundle savedInstanceState) {
        super.onCreate(savedInstanceState);
        setContentView(R.layout.first_layout);
    }

    @Override
    public boolean onCreateOptionsMenu(Menu menu) {
        // Inflate the menu; this adds items to the action bar if it is present.
        getMenuInflater().inflate(R.menu.first, menu);
        return true;
    }

}
 |
| Click image to enlarge |